Build AngularJs on Windows
Clone Repository
First clone the git repository for AngularJs. If you don’t already have git or are unfamiliar with git you can download and install Git for Windows. This is likely the best option for you if you are relatively new to git. You’ll be able to click the “Clone in Windows” button on the right of the AngularJs repository.
Install Development Dependencies
If you don’t already have the NPM package manager installer on your machine you’ll need to install it. Probably the easiest way for you is to install NodeJs. This will install the package manager which is very handy, for much more than this task. Choose the option for your platform here.
Once you have NPM installed you can now finish setting up the dev utilities that you’ll need. AngularJs among many other frameworks and apps build via Grunt. You’ll also need Bower. To install both along with a few other dependencies just run the following from the directory you’ve cloned Angular to:
npm install
Once you have run npm install you’ll need to install the grunt-cli and bower but we’ll need this installed globally. To do so add the -g flag as such:
npm install grunt-cli -g

npm install bower -g
The Missing Environment Setup
There are a few other things that you might get stuck on when trying to build AngularJs via Windows. You’ll need the Java Runtime Environment package installed. This is used quite often and you may already have it installed. If not go here grab it and run the installer for your platform.
Once you have java installed you’ll need to add some Environment Variables to make the build happy. In order to do this click your start button for right click “Computer” from Explorer and choose properties. Next choose “Advanced System Settings” on the left of the window. The advanced tab will open and you’ll see the “Environment Variables” button on the bottom of the dialog window.
You should now be in the Environment Variables dialog on the top you’ll see user variables and the bottom system variables. We’ll need to modify both.
Add Java to Path
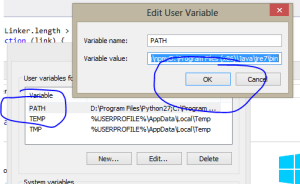
Double click on the line that says “PATH” or highlight and then select edit. Go to the end of the line and add a semi-colon. After the semi-colon add the path to your java runtime environment. Probably something like C:\Program Files (x86)\Java\jre7\bin if you are on a 64bit machine. Add that to the end of the line and then select OK.
Setup Java Virtual Machine
In the System Variables you’ll need to click “New” and add a new key value pair. For the variable name use _JAVA_OPTIONS and for the value use -Xmx512m. This will setup the basic options you’ll need for the virtual machine. Say OK and close out of the dialog boxes.
NOTE: Be sure to close out of any command prompt windows you might have had open. If you started to run the build process before completing the above it won’t work so after installing make sure you’ve closed out of your command windows and then re-launch.
Running the Build
To actually package up the library is a snap you need only run the grunt command which will call the pre-configured Gruntfile.js for you and package it all up into the “build” folder in your repository directory. The command is below:
grunt package
Now What
Get involved and contributed to this awesome project. How do you do that? You can find it all => here.
Smart Table for AngularJs Extended
What is Smart Table
Smart table is module and set of directives to assist in sorting and paging a table/grid of data. I liked it as it doesn’t try to do too much and is simplistic to extend. No offense to some of the other grids but many I found tried to do too much and that usually spells disaster. Why? Well, there’s always something you need that due to the design you have difficulty doing. Smart Table handles the basic functions and leaves it at that.
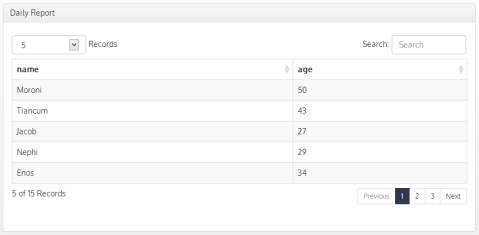
So here is an extended version that adds a couple nice features that make it have more of the Datatables Bootstrap feel. This is optimized for Bootstrap 3 but with little work you should be able to adapt it to your styling needs.
The zip contains the illustrator file used to create the sort icons, the compiled .css file, the Smart Table debug source and a less file for those that are importing Bootstrap and compiling .less. if you don’t know what LESS is don’t use that file.
You’ll also notice is the source file you’ll see /* START MODIFICATION */ anywhere the source has been modified. Hope it helps Email in source if you have ques.
Disclaimer: Just started playing with Smart Table literally today so if you can improve upon the code please do so and comment/email. Perhaps the author can take a look as this was a very quick fix for my needs.


